
Your first ticket
This is the whole loop on a real repository, once. Pick something small and self-contained for the first one: a copy change, a missing test, one component. It takes about ten minutes, and most of that is the agent working while you watch.
1. Add the project
Section titled “1. Add the project”Press the plus beside Projects in the sidebar, or open Settings, Projects, and point Herdloom at a
repository on your Mac. Choose the branch tickets should be cut from, usually main. Nothing is
cloned and nothing is copied; the repository stays where it is.
Adding a project covers the rest of the dialog.
2. Write the ticket
Section titled “2. Write the ticket”If the work is not clear yet, start with an idea and shape it with your agent. Accept the proposal to create its tickets in Backlog, then continue with Press Run below. If it already lives in Jira or GitHub, import the ticket and continue from the same step.
Press C, or New ticket. Give it a title, then a description in Markdown that says what, where,
and how you will know it is done. Drop a screenshot or a spec into Context if one helps. Underneath,
Writes the code and Writes the plan are prefilled from the project, and you can change
either for this ticket alone.
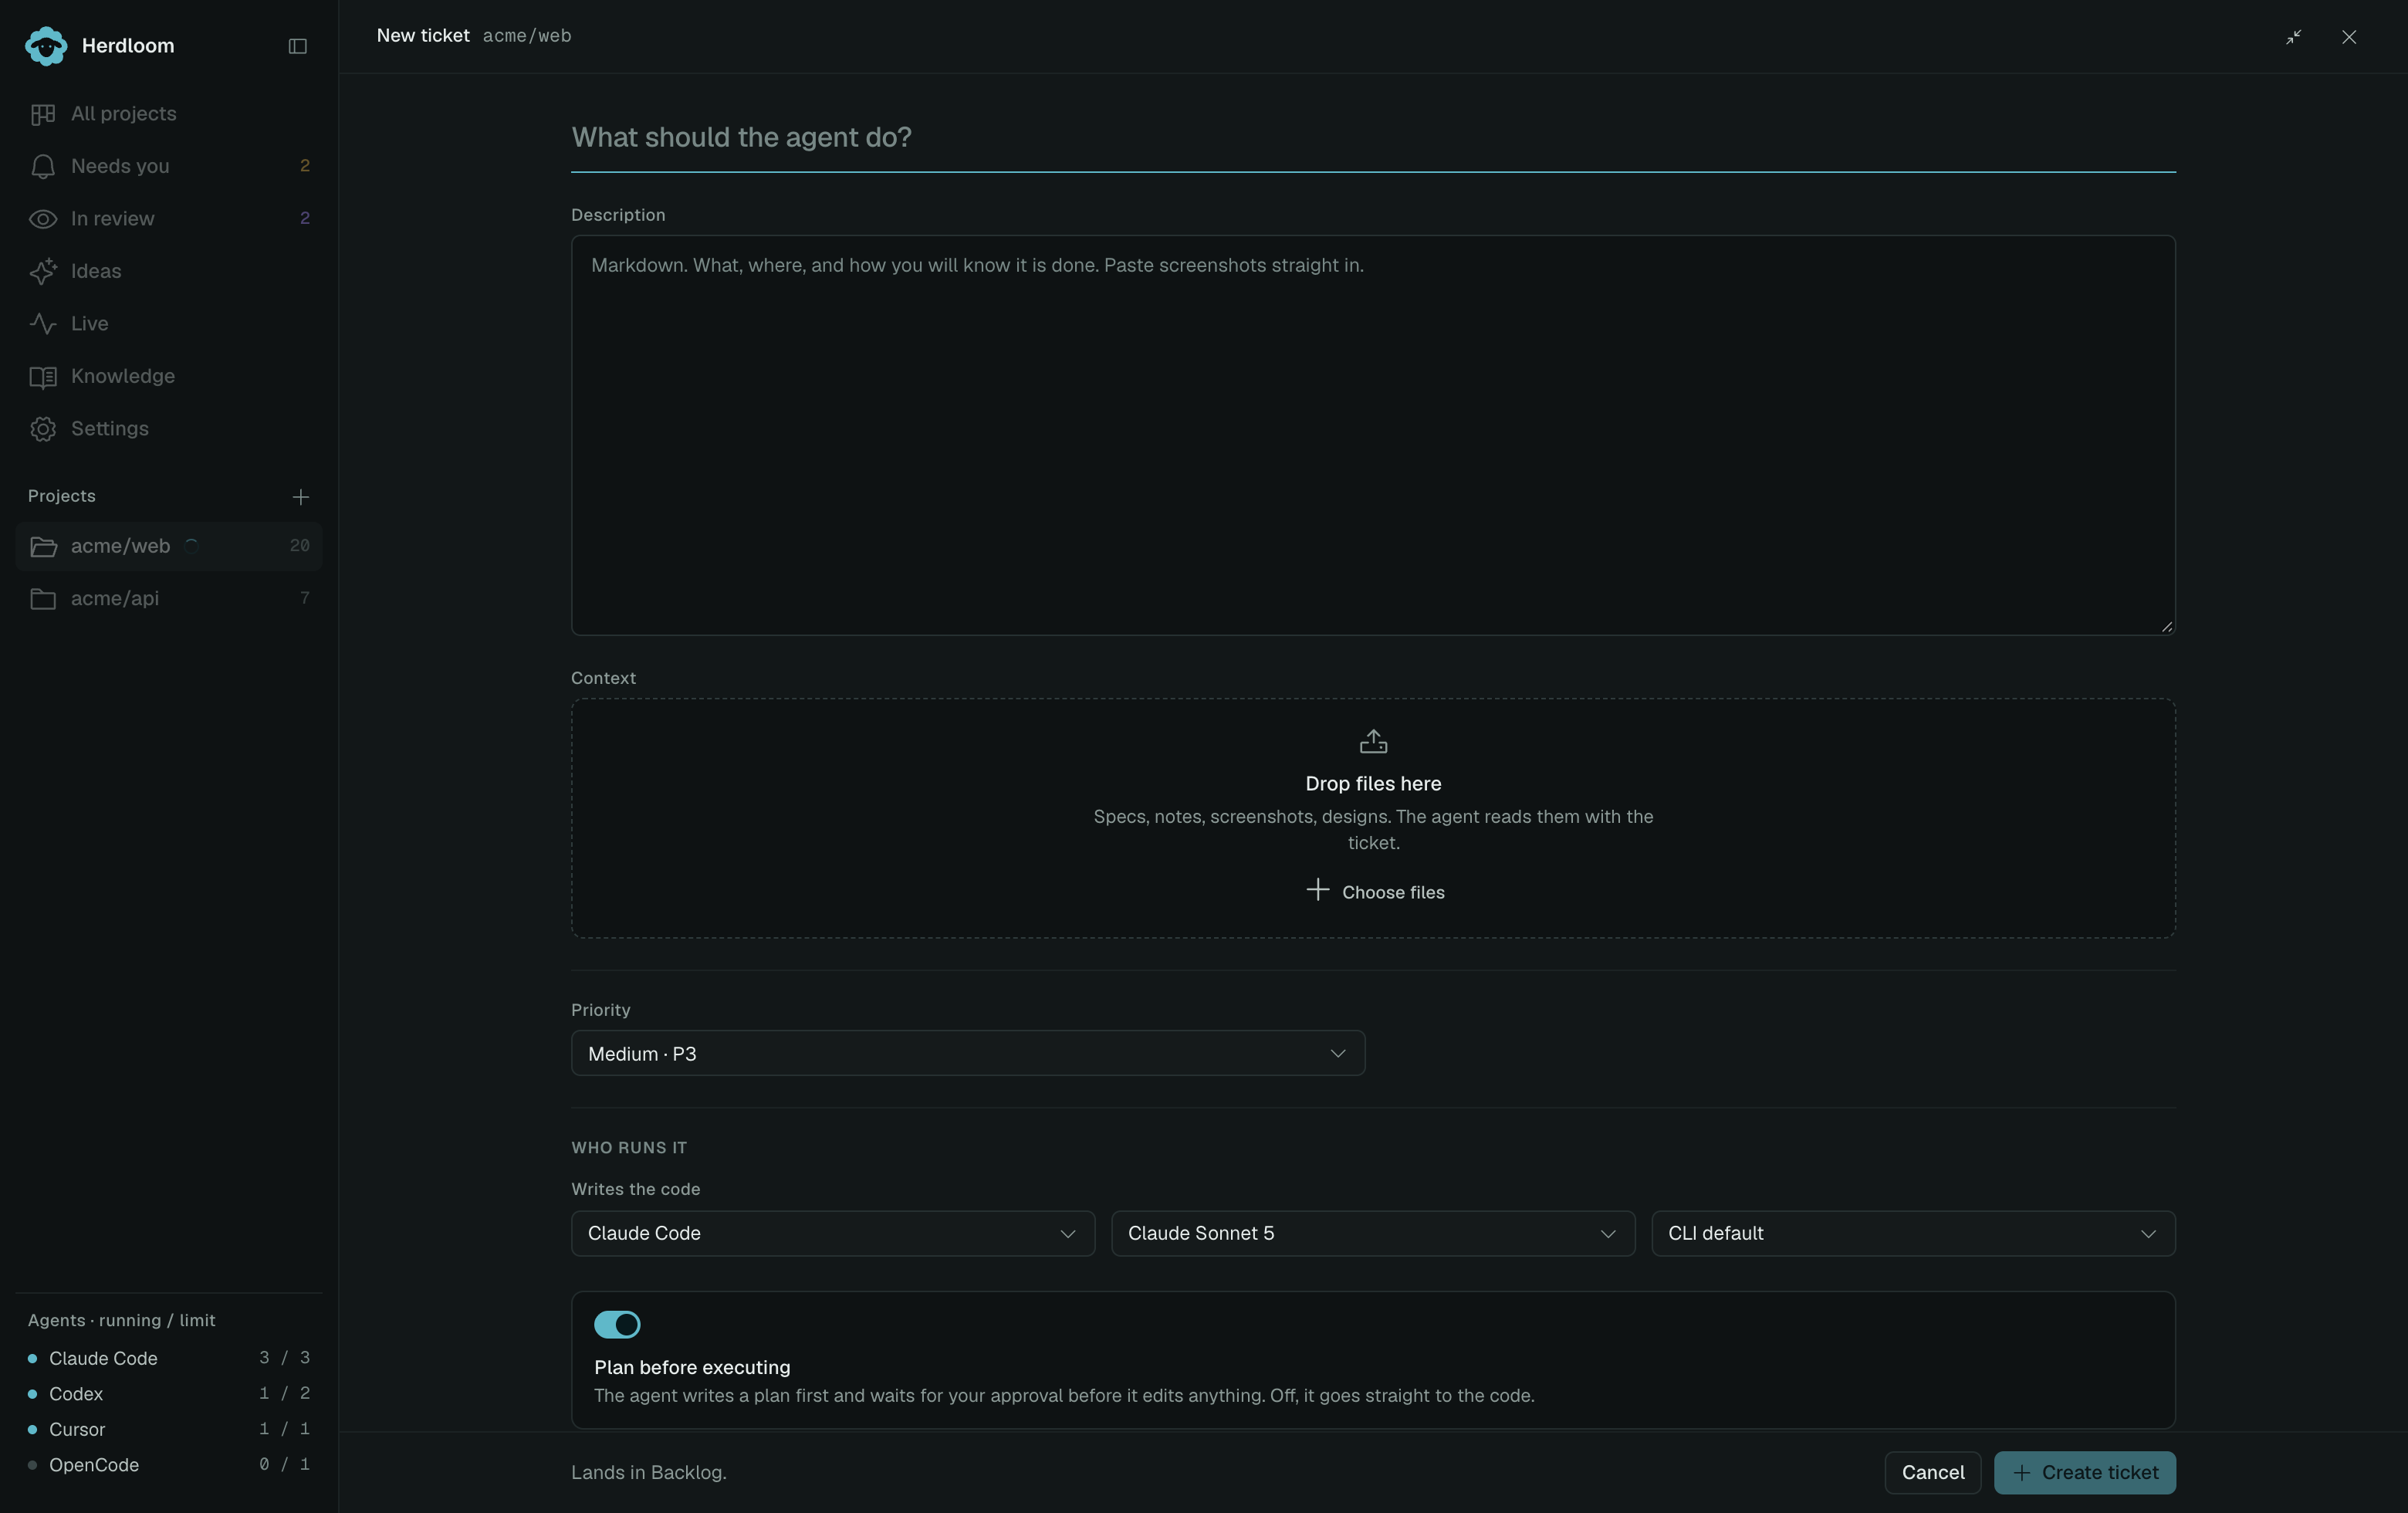
Leave Plan before executing on for the first one. The ticket lands in Backlog. Writing a ticket has the parts that matter most.
3. Press Run
Section titled “3. Press Run”Open the ticket and press Run at the bottom of the drawer. Herdloom cuts a fresh checkout of the repository on a branch of its own, copies in the local config files git ignores, installs dependencies, and starts the planning agent. Nothing happens in the checkout you work in. See worktrees.
4. Read the plan and accept it
Section titled “4. Read the plan and accept it”The card moves to Needs you in amber with an Approve plan button. The plan opens as a page: numbered steps, the files it expects to touch, the risks it found, and any questions it has with an answer box above them.
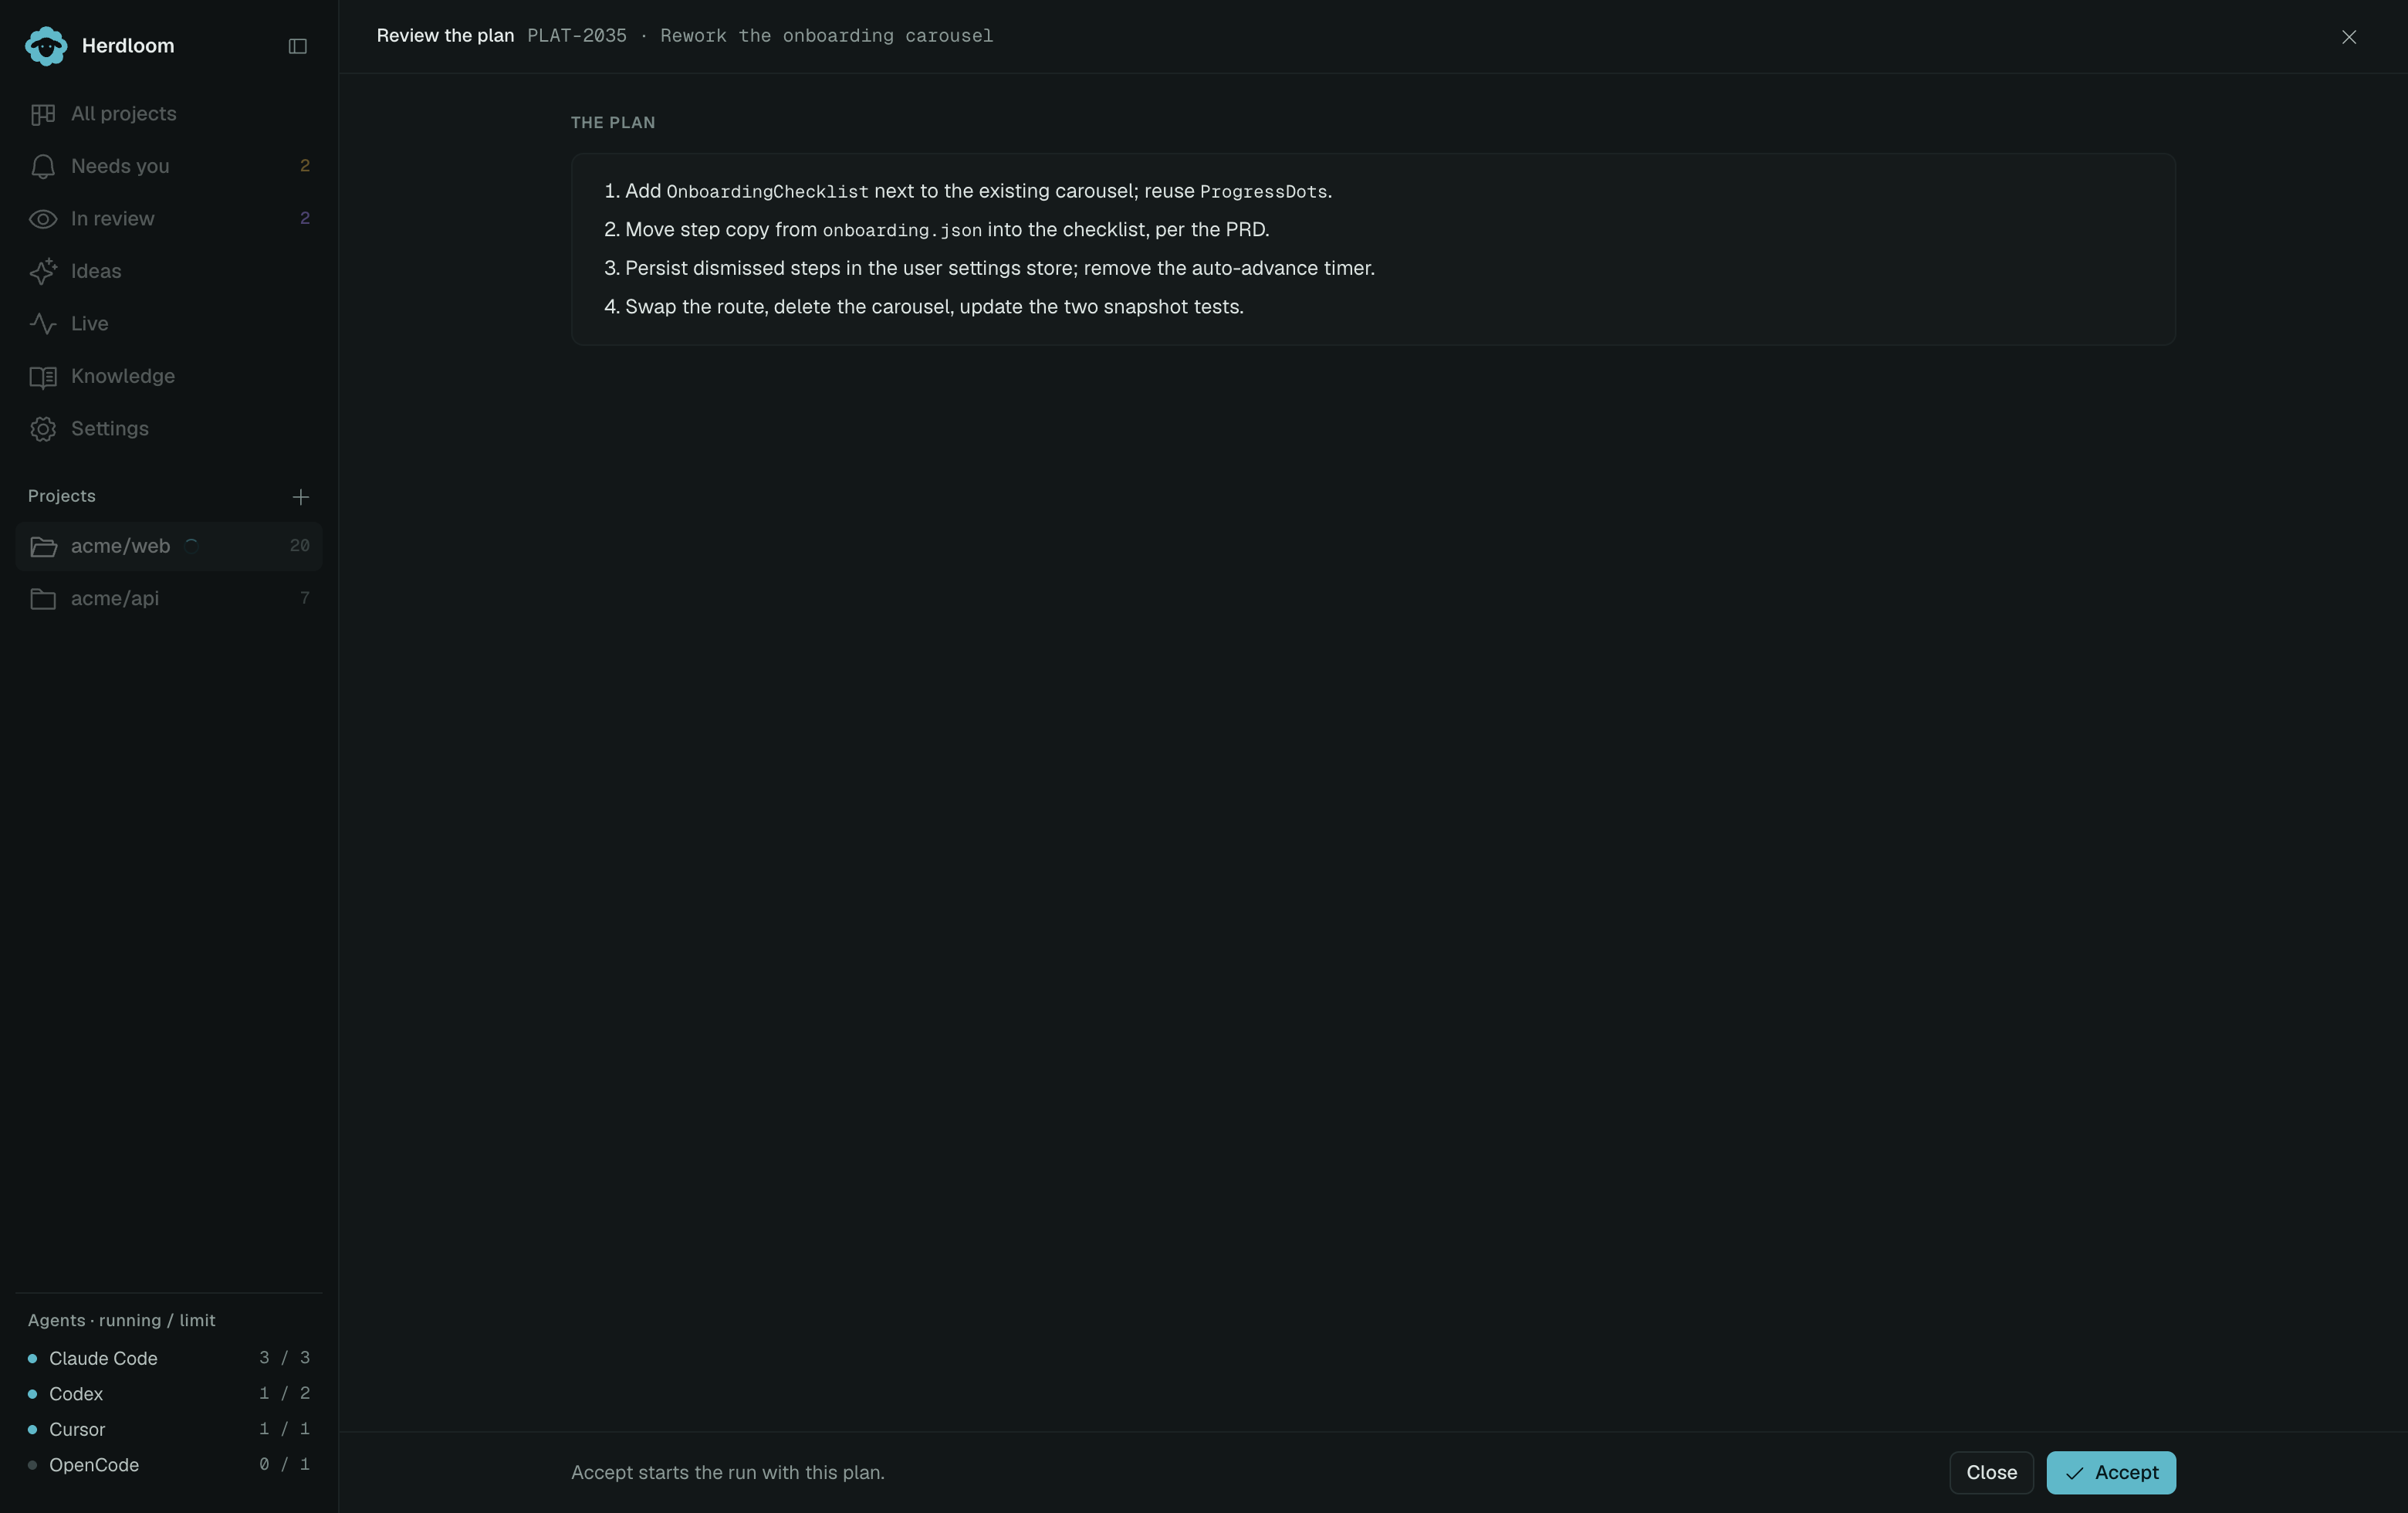
Read the steps against what you meant. Edit the text if a step is wrong, answer the question if there is one, then press Accept. This is the cheapest moment to catch a misunderstanding. See approving a plan.
5. Watch it execute
Section titled “5. Watch it execute”The card moves to Executing, with a border beam and the agent’s last action on it. When the agent finishes, Herdloom checks the work outside the model: commits must exist on the branch, and the project’s own test command must pass. A failed attempt starts again with fresh context and a note about what went wrong. Phases of a run explains the sequence.
6. Read the review
Section titled “6. Read the review”With review on, a second agent reads the branch against the ticket before you see it, turns the ticket into a checklist, judges each item from the code, and lists what it found. The card arrives in In review carrying the verdict.
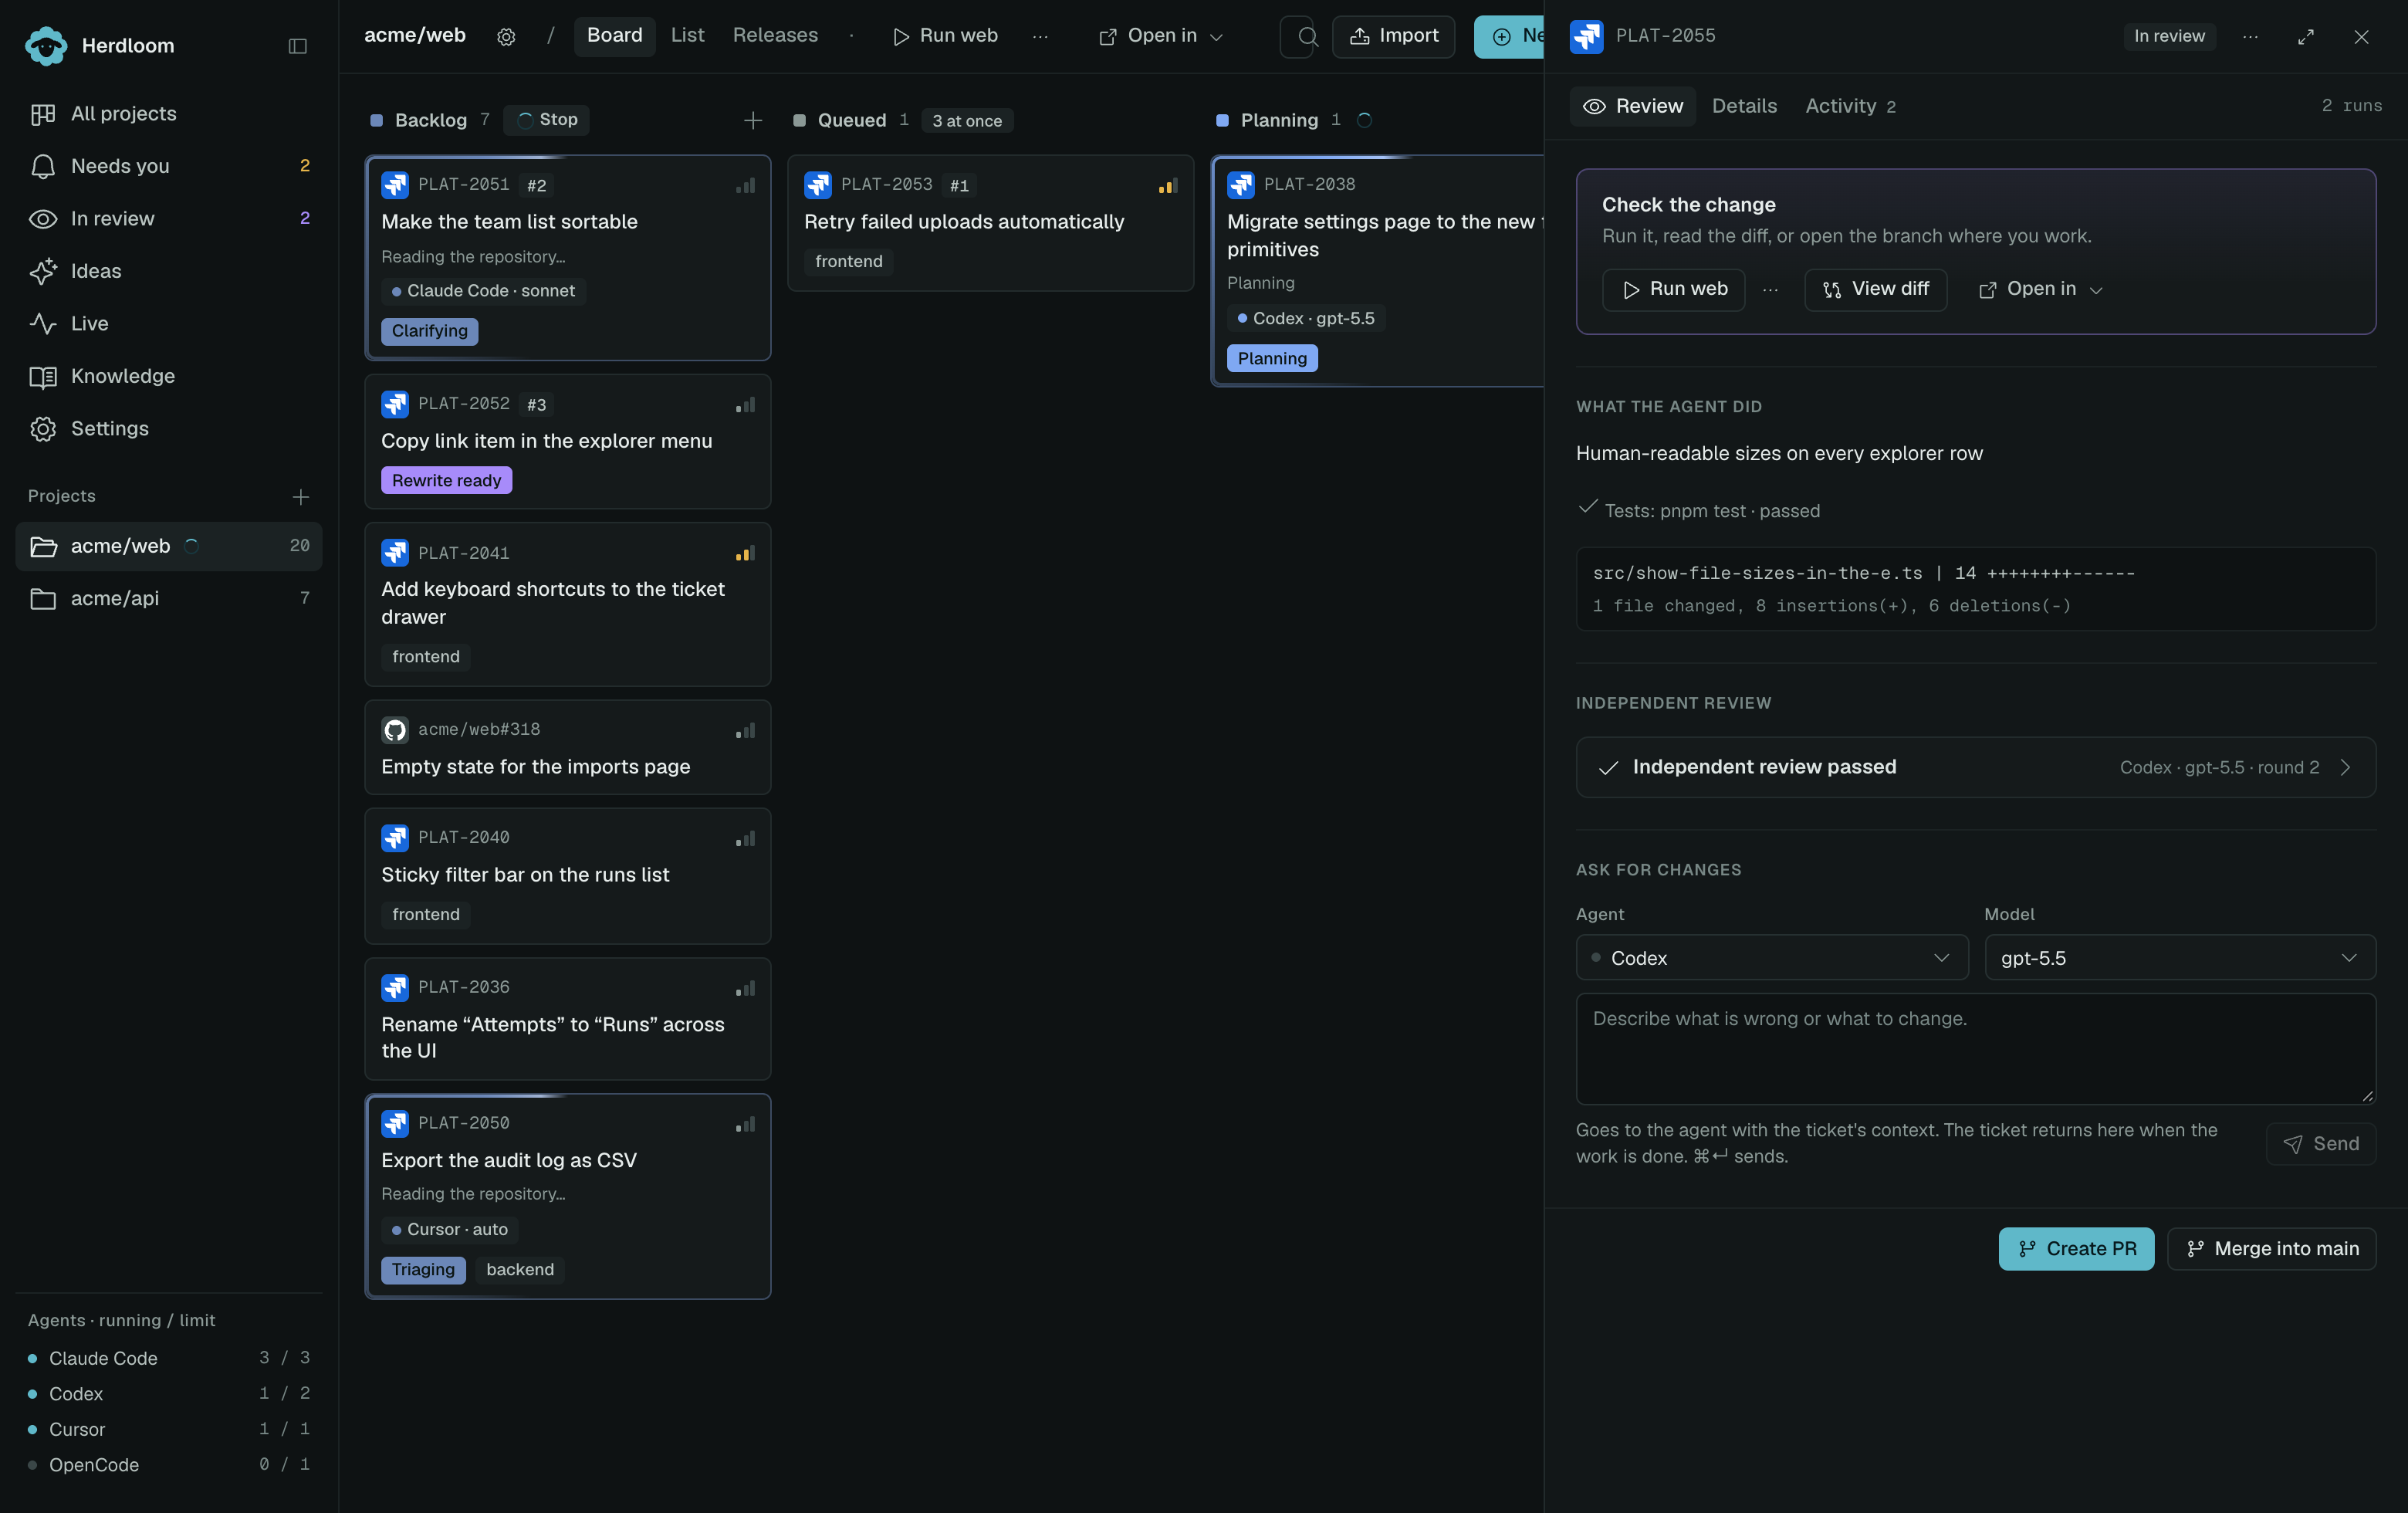
The Review tab leads with what the agent says it did, the tests it ran and the files it touched, then the independent verdict. See review.
7. Look at the change
Section titled “7. Look at the change”View diff shows the branch against the base branch, file by file. Run app starts the app from this ticket’s checkout on its own port, so the before and the after can be open side by side, and Open in drops you into your editor at the same folder. See reading a diff.
8. Ask for changes, if you want any
Section titled “8. Ask for changes, if you want any”The box on the Review tab sends corrections to the agent’s own session, with the ticket’s context still there. The ticket goes back to work and returns here when it is done, reviewed again.
9. Open the pull request
Section titled “9. Open the pull request”Create PR pushes the branch and opens a pull request on GitHub. The card moves to In PR, and when the pull request is merged the ticket moves to Done on its own. A repository with no remote merges into the base branch from here instead. See pull requests.
Do it again with three tickets at once, then decide how much of the loop should run without you under automation.