
Import your tickets
If your team already writes issues in Jira or GitHub, bring that work into Herdloom without retyping it. Import reads the issues, lets you preview them, and creates tickets in the project you choose. It does not change the original issues.
1. Add the repository
Section titled “1. Add the repository”Add a project pointing to the local repository where the work will happen. For GitHub issues, choose the project whose GitHub remote matches the issue’s repository.
2. Connect your tracker
Section titled “2. Connect your tracker”Open Settings → Integrations → Add connection for Jira, or when you need a saved GitHub connection. Choose the type that matches where your issues live:
| Your tracker | What to use in Herdloom |
|---|---|
| Jira Cloud | Choose Jira Cloud. Enter your site URL, such as https://acme.atlassian.net, your account email, and an API token. |
| Self-hosted Jira Data Center | Choose Jira Data Center. Enter your server’s base URL, including any path such as /jira, and a personal access token. Your Mac must be able to reach the server. |
| GitHub Issues | For GitHub.com, Herdloom can use your signed-in GitHub CLI (gh) account. If that account cannot access the repository, add a GitHub connection with a token that can. |
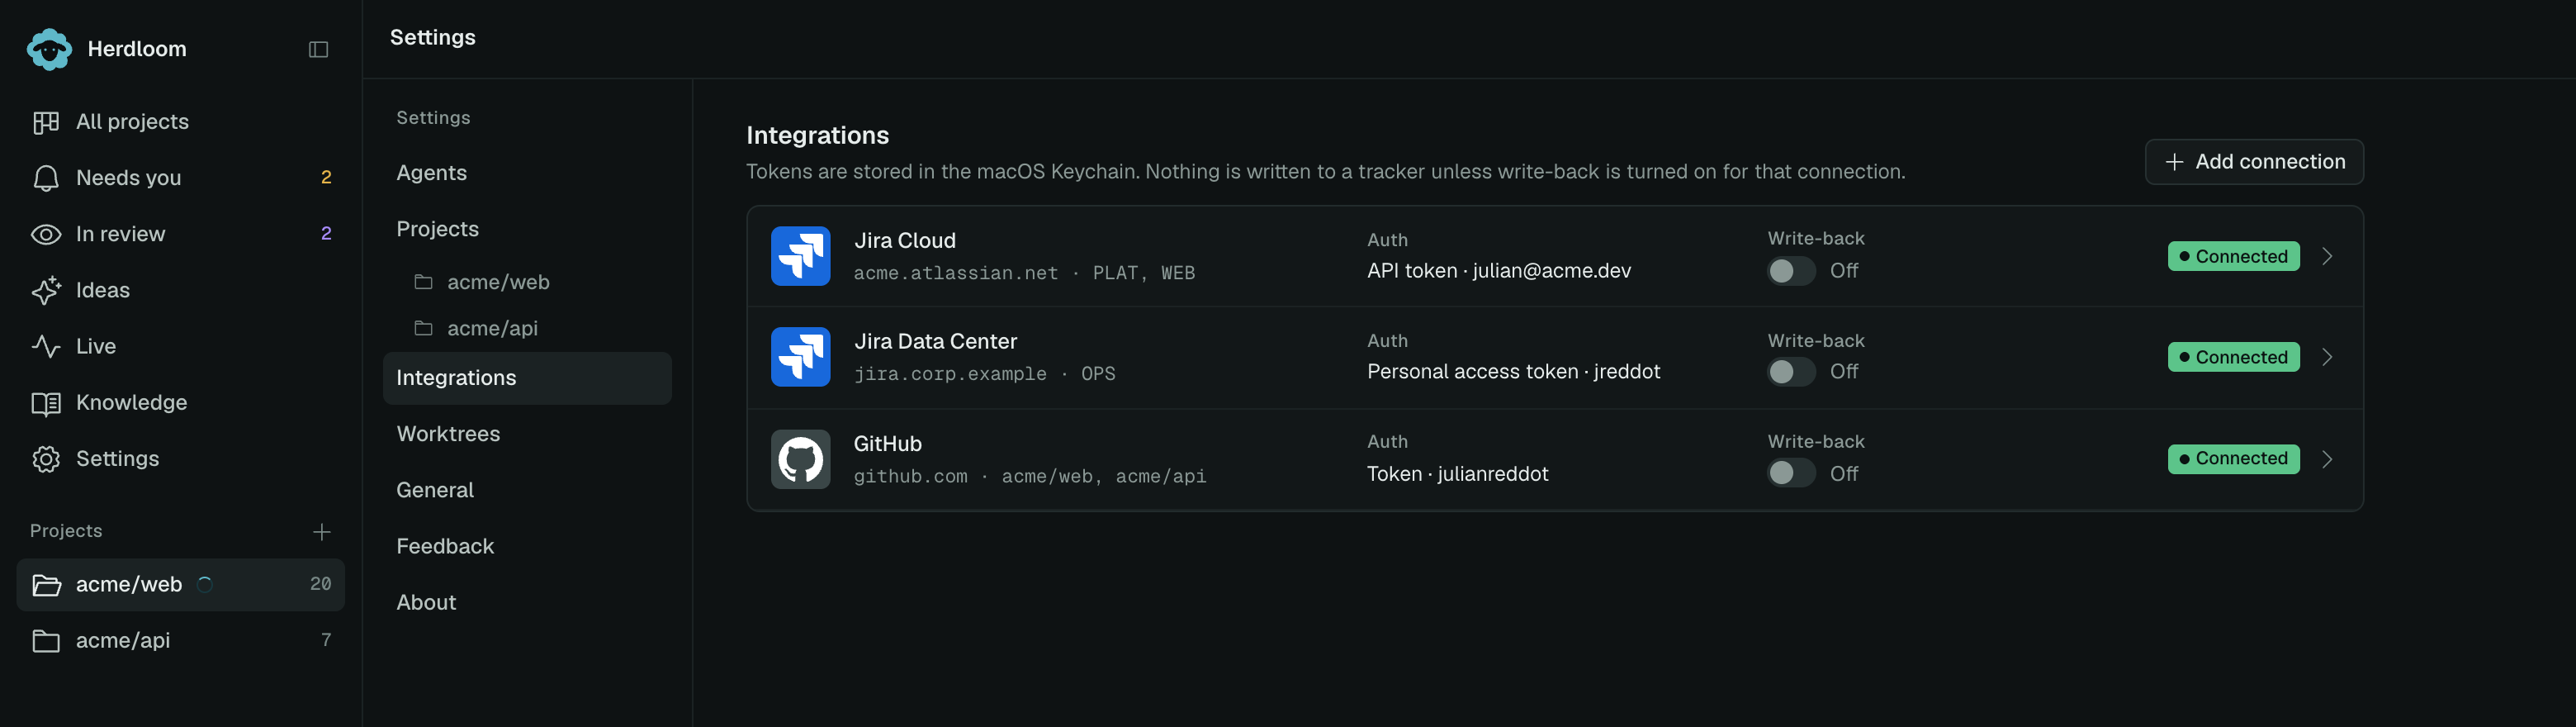
Save and test a new connection before importing. Leave Write-back off while getting started; it controls whether later work can post updates to the original issues.
3. Preview a few issues
Section titled “3. Preview a few issues”Choose Import in the board toolbar, select the project, and paste issue URLs, one per line. For example:
https://acme.atlassian.net/browse/WEB-42For self-hosted Jira, use the issue URL from your own server. For GitHub, use a URL such as
https://github.com/acme/web/issues/42.
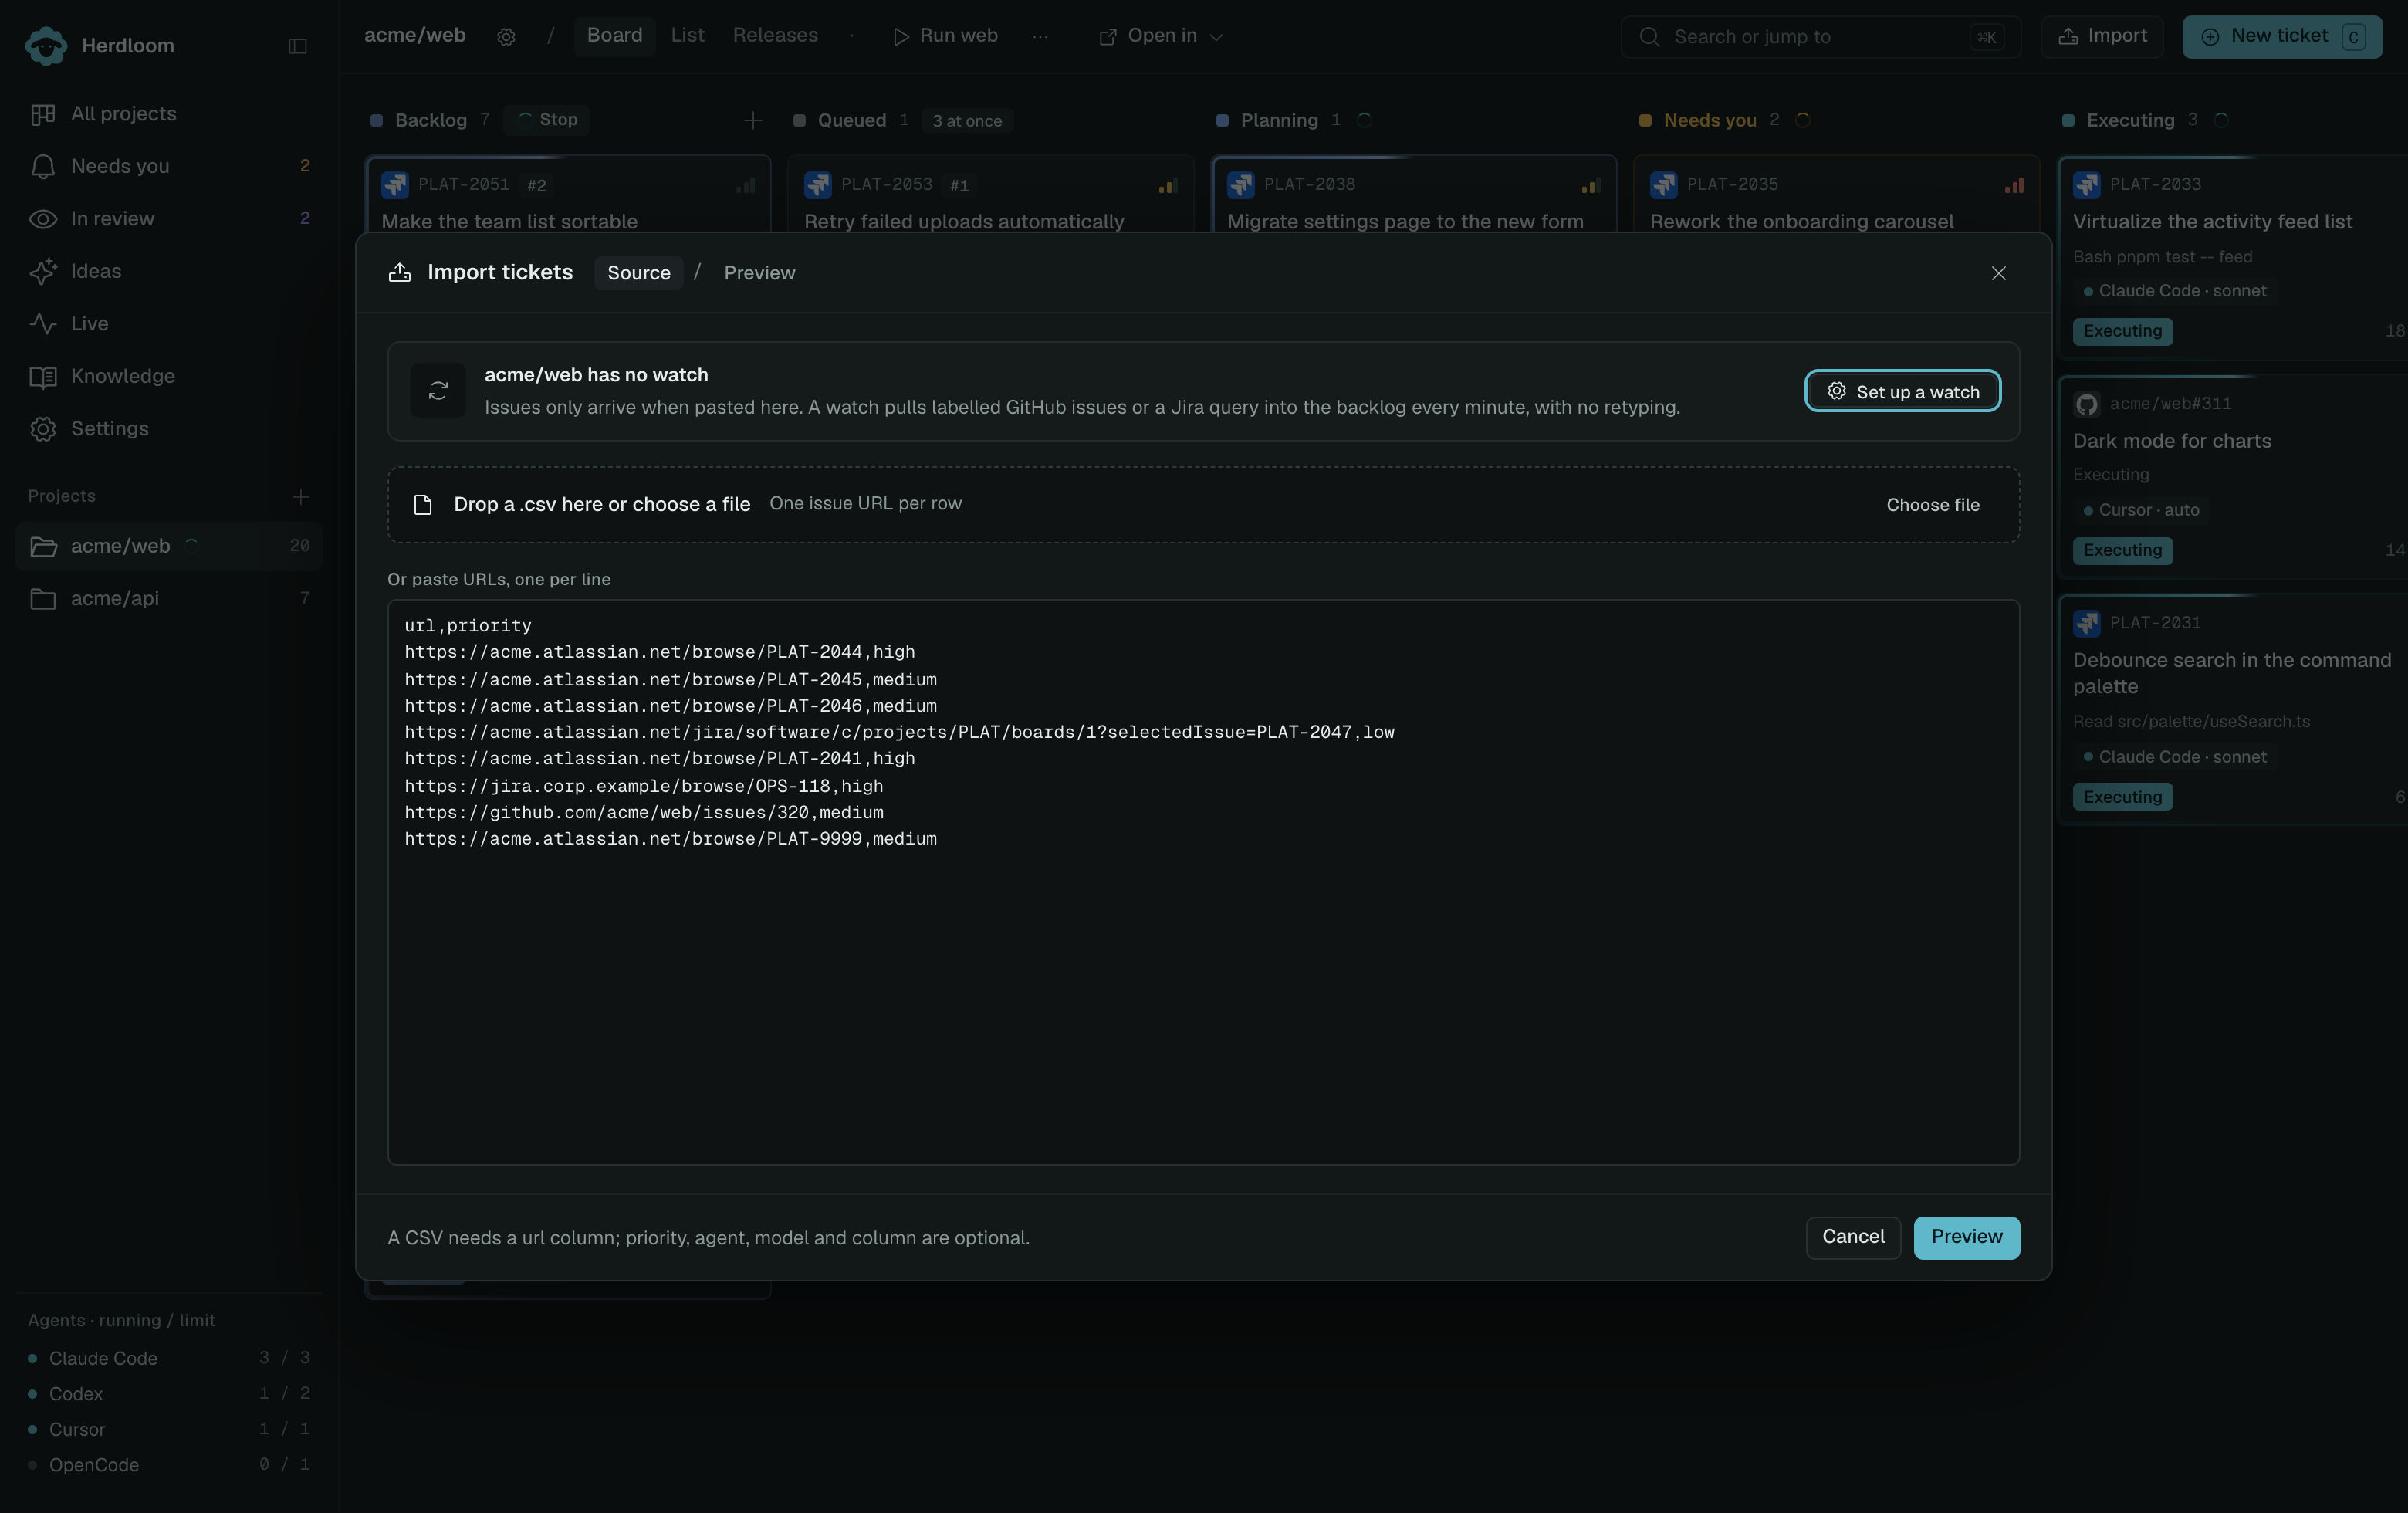
Choose Preview and check the titles and selected rows. Only new issues can be imported; Herdloom flags duplicates, missing connections, and issues it cannot read. A GitHub issue from a different repository is flagged rather than imported into the wrong project.
4. Add them to Backlog
Section titled “4. Add them to Backlog”Keep the destination at Backlog for your first batch. Check the agent, model, and Plan before executing setting, then choose Import. Titles and descriptions come across, and each ticket keeps a link to its original issue. Jira attachments arrive as links, not as downloaded files.
Open one small ticket and continue with Press Run. Importing into Backlog lets you review the work before starting an agent.
More ways to bring work in
Section titled “More ways to bring work in”For a larger batch, import a CSV or text file of issue URLs. To keep adding matching issues automatically, set up a Jira query or GitHub label watch.
The detailed guides cover Jira Cloud and Data Center and GitHub, including what comes across and optional write-back. For work that is not in a tracker, start with an idea or write your first ticket.